At Iteration Insights, we often use Microsoft (MS) Forms as a resource to gather feedback for the organization. Microsoft Forms is an effective tool to gather and export data with many formatting options and features to collect information.
This blog will walk you through the process of how to create a Microsoft form, format a Form, and then share the Form to gather the feedback you require. The sample information of this blog is from a Fall Reboarding Day in September with the Iteration Insights team.
Sections
- Introduction
- How to Create a Microsoft Form
- How to Format a Microsoft Form
- How to Collect Responses for a Microsoft Form
- How to Collaborate on a Microsoft Forms
How to Create Microsoft Forms
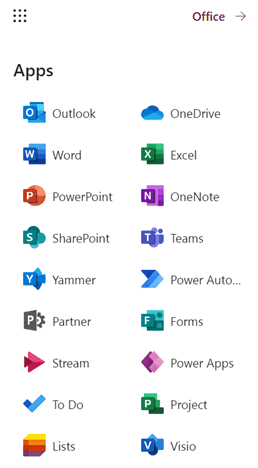
First, go to www.office.com click on the App launcher box in the top left corner, and then click on the Microsoft Forms App.
Alternatively, in the dialogue box, you can type in www.office.com/launch/forms. Here is where you can pick up on previous Microsoft Forms templates you have used in the past or create a new form.

Once you have reached the page that looks like the image above, click on New Form.
Congratulations! You have now created a Microsoft Form. Let’s now look at formatting the form in different ways to meet your specific needs.
How to Format a Microsoft Form
First, you will need to create a title and summary of the form. Creating a summary of the form is an optional step, but beneficial to provide context to individuals filling out the form.

Creating Questions to your Forms
To create a new question for your Microsoft Forms, simply click on the green Add New button.

When it comes to choosing the format of your questions, Microsoft Forms gives a variety of options. These include Choice, Text, Rating, and Date. Let’s take a closer look at each to find the perfect fit for gathering your data.

Making Choices for your Forms
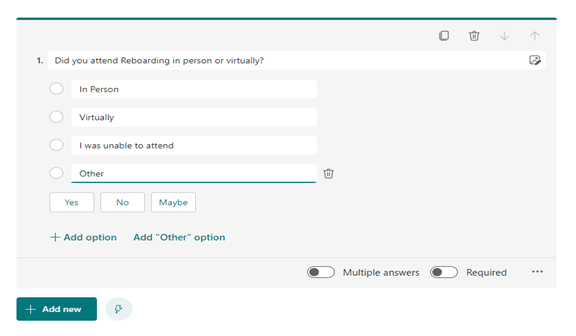
The choice format allows you to give responders different choices to choose from. You can create questions with multiple answers or collect one answer to a specific question. The Choice field is in the format of a multiple-choice question and is great to collect a specific answer from your target audience.
Please see the example below:
Add Text to your Forms
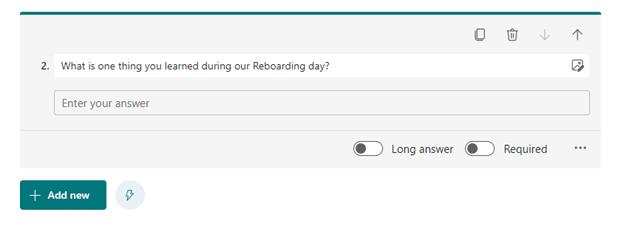
The text option allows responders to fill in their responses in a text format. Answers can be collected in short or long answer format. The text option is good for collecting personalized information or gathering specific information from each individual that may need a long or specific response when gathering feedback.
Create Ratings / Reviews
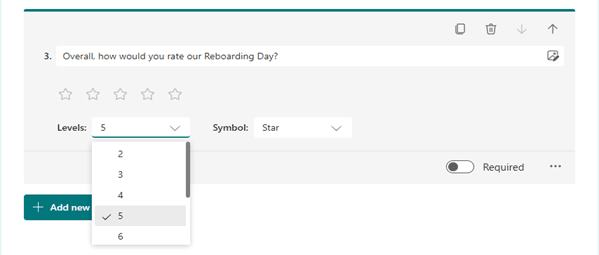
The rating option allows responders to rate their experience from 1 – 6. Voters have a choice of Symbols or numbers to choose from. Rating is a great way to receive quantifiable data from your audience when assessing form results. An example of this is provided in the following two images:

Use Dates on your Forms
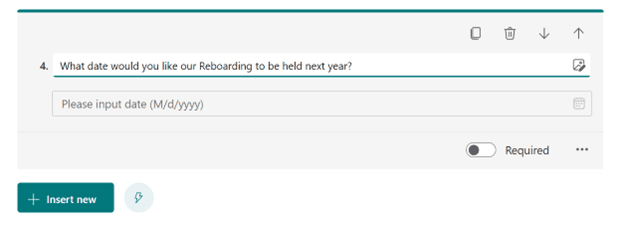
The date option allows responders to give their answers in a date format, this option is beneficial to find a mutually agreed on time for a team function, event, or to schedule a meeting.
Copy, Delete or Move Questions
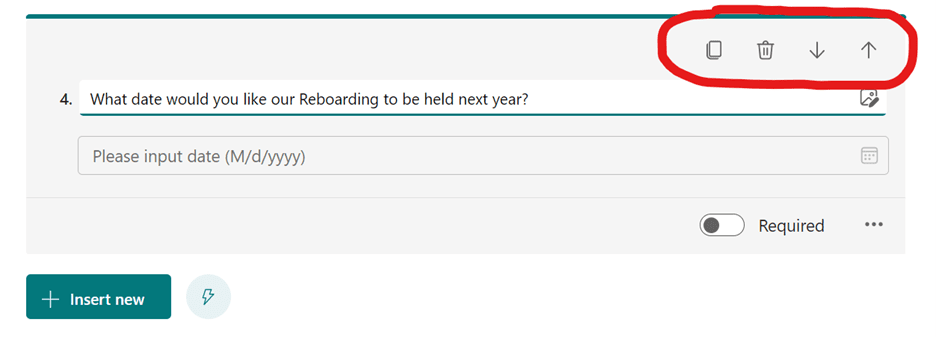
In the circumstance where you would like to copy, delete or move a question up or down in your Form, simply click on the question and go to the top right-hand corner for any of these options as seen in the image below:
Multiple Answers, Required Responses and More for your Surveys
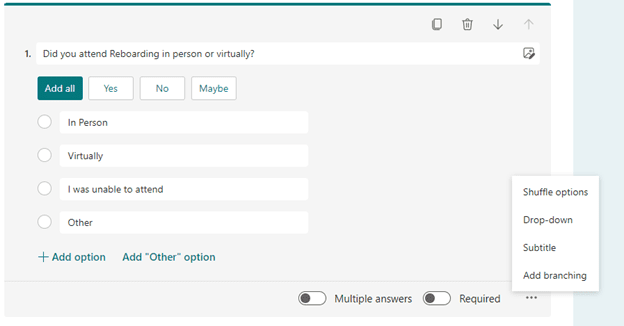
Microsoft Forms gives you lots of options to enhance your survey questions. For example, your audience could provide multiple answers to a question. Or you can make a question required meaning the responder cannot complete the form without answering that specific question. To implement this, simply click on the question you are looking to enhance and go to the bottom right-hand corner for options:
How to Collect Survey Responses for a Microsoft Form
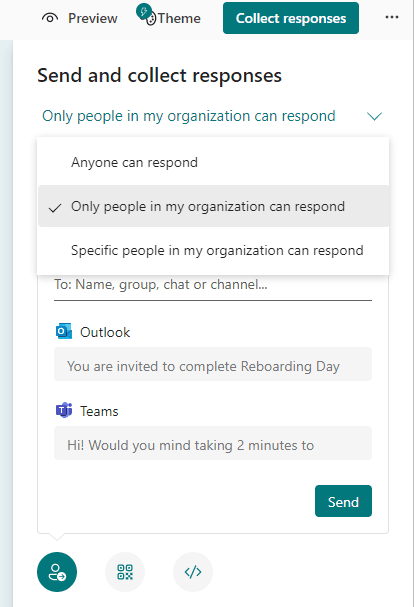
Once your form is complete and ready to be sent out. Go to the top right-hand corner and click on Collect responses:

Please note that when you are collecting responses on a form, there are a few things to be mindful of. If you are sharing a Micosoft Form with others within your organization then make sure to click Only people in my organization can respond to grant individuals within your organization access to your form.
Sharing Microsoft Forms externally

If you are sharing your forms externally, please note that you need to change the response to Anyone can respond. This will ensure that anyone with the form link is able to respond and access the form.
How to Collaborate on a Microsoft Form
There may be a situation where you want to share your Microsoft Forms for collaboration purposes with someone on your team so that they can edit or help improve the form prior to sending it out for responses. To do that, simply click on the three ellipses next to collect response and click on collaborate or duplicate. This will generate a separate link for collaboration purposes that you can share with another person or your team.

Send Out your Microsoft Forms Survey for Responses
Once you have chosen the right type of link for sharing purposes you are ready to share your Micosoft Forms and collect responses. All you need to do is click on a copy which will then allow you to share the link with the appropriate individuals with whom you are looking to gather feedback.

You can share the full link or shorten your URL as needed and share it through your preferred medium. Our example survey for this blog will be sent through Microsoft Teams.
Thank you for taking the time to read this blog! I hope this information was helpful for you and you now feel confident creating, formatting, and sharing Microsoft Forms.


