
Documents and files accessed and edited by multiple users often result in different versions with inconsistent information. To address this issue, SharePoint provides features such as Versioning, Check-in, and Check-out, which are designed to help you effectively manage document collaboration.
These features help prevent multiple users from accidentally overwriting changes made by others, ensuring better document control and version management. Follow the steps below to learn how to use Versioning, Check-in, and Check-out in SharePoint:
Sections
- Introduction
- Check-Out a Document
- Edit a Checked-Out Document
- Check-in a Document
- View Version History
- Conclusion
Check-Out a Document
When versioning is enabled, the first step should always be to check out a document before attempting to modify it. This is a crucial step to avoid conflicts and ensure that the document’s integrity is maintained throughout the collaborative process.
By following the steps below, users can seamlessly check out a document, providing them with the exclusive rights to make changes without the risk of conflicting edits from other users.
- Go to the location of the document you wish to edit.
- Right-click the document you want to edit or hover over it and click on the ellipsis (three dots). Click on “Check Out” in the menu as seen below.
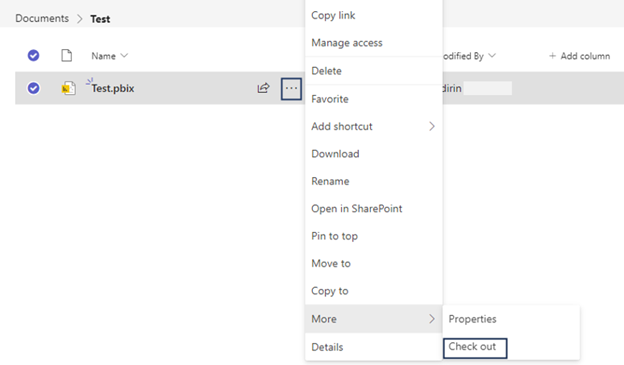
- The document is now checked out to you and other users will see that it is checked-out

Edit a Checked-Out Document
A document can be modified after it has been checked out. It can be downloaded, edited, and re-uploaded to the same SharePoint location. To maintain consistency, it’s important to ensure that the document name remains the same during the check-out and check-in.
Check-In a Document
After making changes, it’s important to check in the document so that others can access and modify it. Please follow the steps below to check in a document:
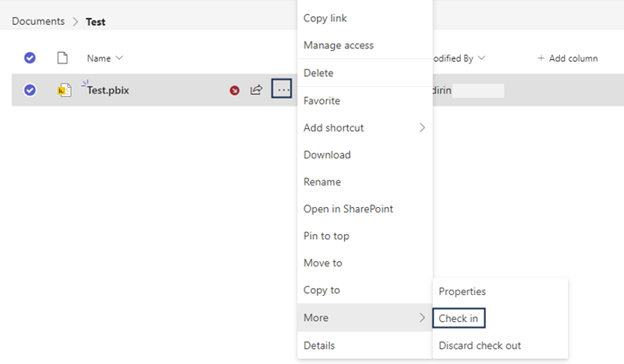
- Go to the location of the checked-out document.
- Right-click the document you want to edit or hover over it and click on the ellipsis (three dots). Click on “Check In” in the menu as shown below.
- Provide a comment that describes the changes made in this version.
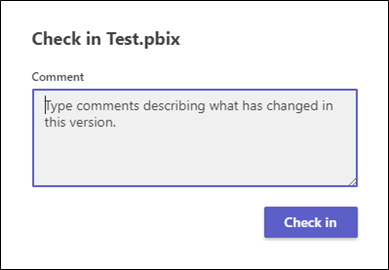
- Finally, click “Check in” to complete the check-in.
View Version History
When versioning is enabled, SharePoint keeps track of the version history of the document, allowing you to access and review previous versions of the document. Please refer to the following steps to view the version history:
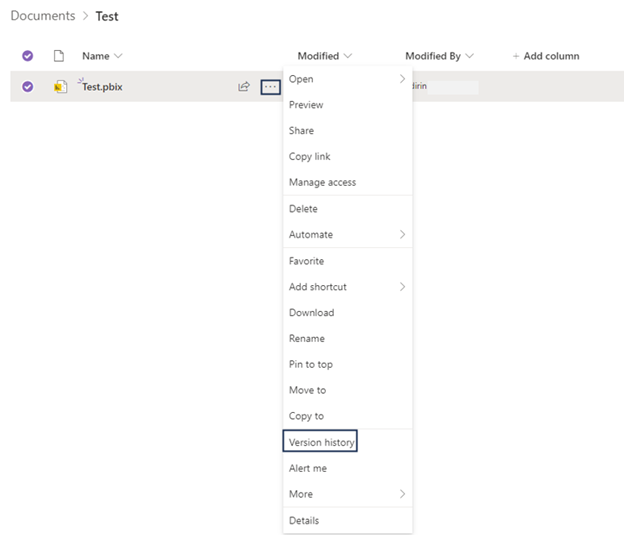
- Navigate to the document location.
- Select the desired document for which you need to access the version history.
- Right-click the document or hover over it and then click on the ellipsis (three dots). Click on “Version history” in the menu as seen below.
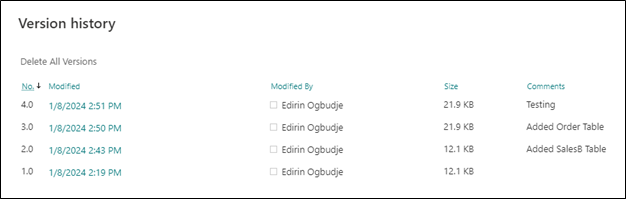
- Here, a list of all versions, along with the user’s name responsible for the changes, and the date and time of each change, are visible.
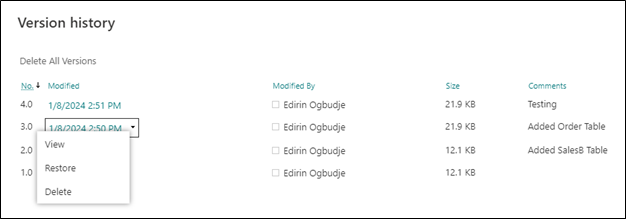
- You can also restore previous versions if needed. Hover over the version date and click the drop-down arrow. Click on “Restore” as shown below.
Conclusion
By using Versioning, Check-in, and Check-out in SharePoint, you can track changes to documents, collaborate more effectively, and avoid conflicts when multiple users are working on the same files. These features are especially valuable in environments where document collaboration and control are critical, such as in organizations with multiple contributors.
