

Microsoft Forms is a common tool used to collect survey data. While it is an awesome tool for data collection, a better choice for reporting and visualizing the data is to use Power BI.
As there is no Power BI connector for Microsoft Forms, we can use a workaround that uses the Web connector.
This method creates what is considered a Group Form in MS Forms by using the Forms for Excel option in SharePoint. This means that anyone with access to the SharePoint Group that the Form is created in will have access to the Responses in the Excel file. This is an updated version of our Importing Microsoft Forms to Power BI blog.
Before creating the Form, you should consider what kind of information is being collected, and who in your team should have access to this information. If you wish to connect to a private survey, check out our other tutorial that uses a Power BI Streaming Data Set.
Note, this method also assumes that you have not already created your Survey in Microsoft Forms and will be creating one from scratch. If your form has already be created, you can transfer ownership to a group without having to recreate the form. This will create the Excel file in SharePoint so that you can connect Power BI to that Excel file. Find this file by opening the response in Excel on the responses tab after transferring ownership. This way you do not need to set up a streaming data set and you do not need to recreate (and potentially) lose the form responses.
Contents
- Step 1 – Create the Forms for Excel in SharePoint
- Step 2 – Create Your Survey
- Step 3 – Locate and copy the file path for the Forms response output file.
- Step 4 – Connect the Forms response file to Power BI using the Web Connector
Step 1 – Create the Forms for Excel in SharePoint
Go to the SharePoint site you wish to hold the data in and select Documents from the navigation menu on the left-hand side.

In the Documents tab, open the folder you wish for the responses to be stored. If you do not have a folder already, create one in this step by clicking the + New dropdown.
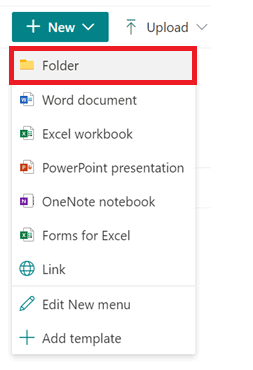
Now that you have the folder opened, we will create the Form.
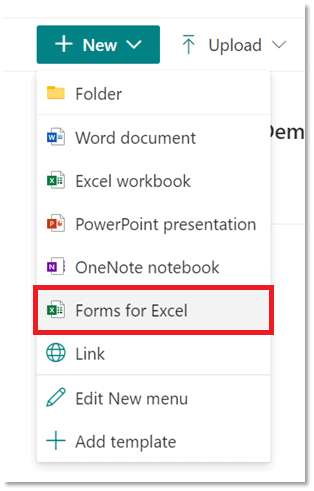
In the + New menu, select Forms for Excel
A window will appear asking you to name the Excel file.
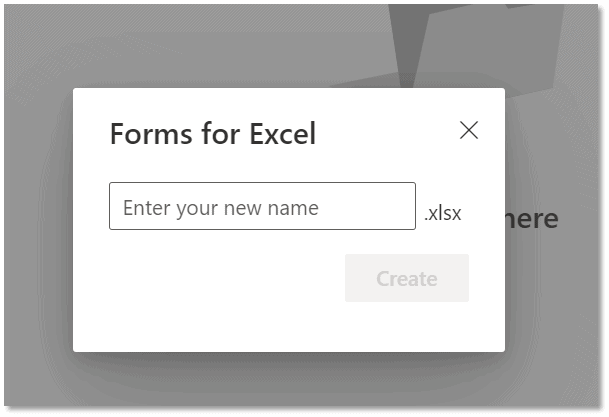
After naming the file, a new browser tab will open and you will be taken to a blank form in forms.office.com.
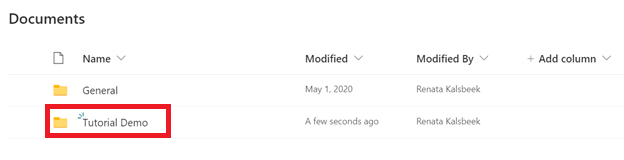
By creating the survey through SharePoint Groups, an Excel file is now located in the Documents folder that you selected. This is where the responses from your survey will be automatically stored.

Step 2 – Create Your Survey.
The next portion will be to create the questions needed in your survey. As this portion will vary for every instance of using MS Forms, I thought it would be more beneficial to provide you with an overview of the question’s types in MS Forms.
For best practices in survey creation, I recommend this article by SurveyMonkey. If you already know about MS Form question types, skip to Step 3 here.
For fun, I have inserted the survey that I created in this tutorial for you to fill out.
Question Types in Microsoft Forms
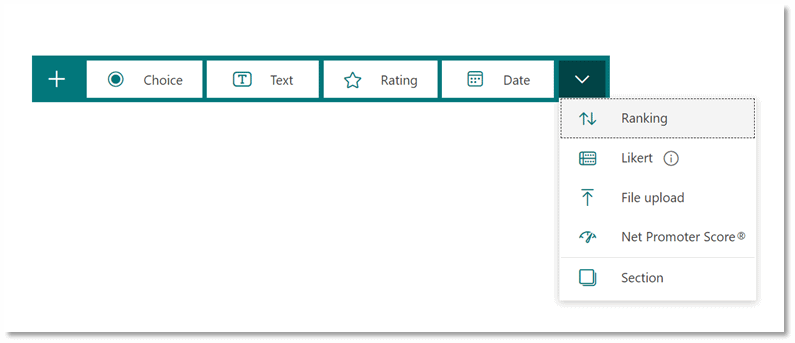
Choice
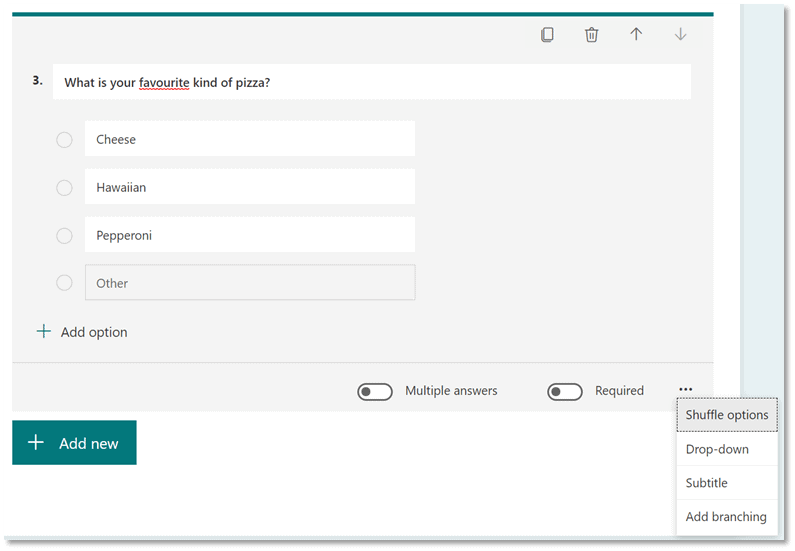
The first question type in MS Forms is Multiple Choice. This type allows the respondent to select from an option set created by you.
One feature here is the “Other” option, with allows the respondent to type in an answer different from the one provided.
Another feature is that the survey creator can specify if they wish to allow more than one answer.
In the more options, the form creator can specify if they wish for the options to be shuffled and if they would rather it be a drop-down list.
Text
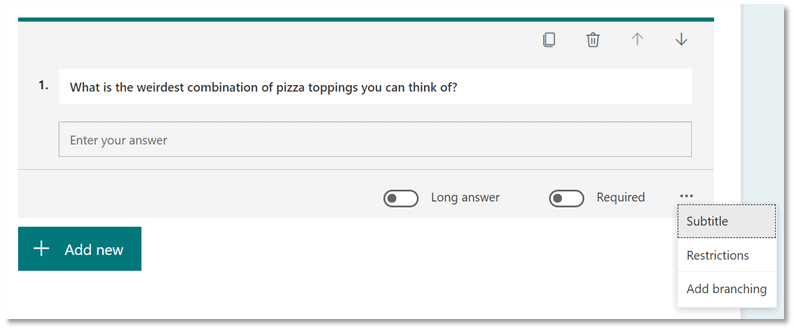
The second question type is called Text. This type allows for short or long answers typed out by the respondent. The character limit for a short answer is approximately 1,600 and for a long answer is 4,000.
The restrictions option allows the survey creator to restrict the text input to only allow numbers, and further restrict that to a range of numbers.
Rating
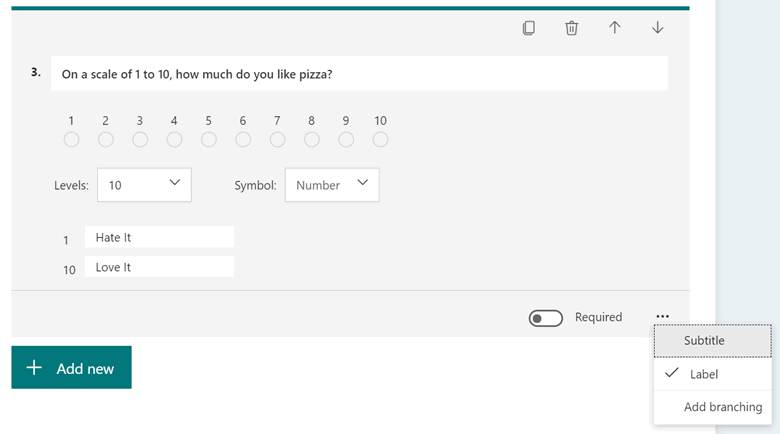
The rating question asks respondents to select where they fit on a scale based on the question. The scale can have up to 10 levels and MS Forms gives the option to either have a number or star symbol.
In the more options, you can add labels for the lowest and highest options, as seen in Figure 10 with 1 labeled as “Hate It” and 10 labeled as “Love It”. Adding labels is generally considered the best practice for rating questions.
Date
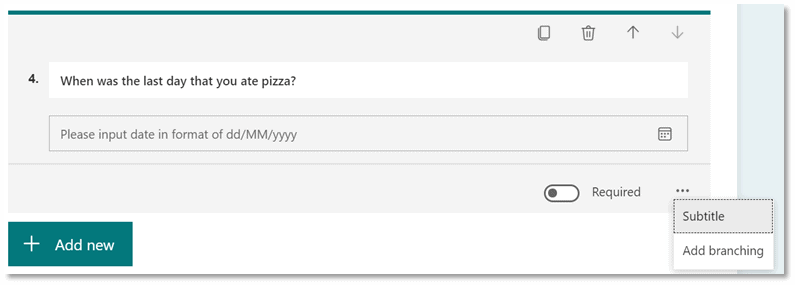
The date question allows the respondent to select a specific date from a calendar.
Ranking
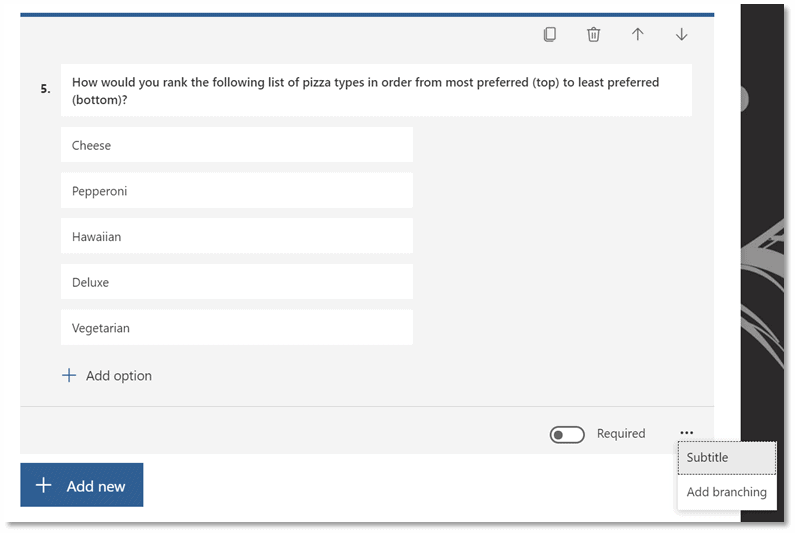
The ranking question type asks the respondents to rank a list of options. It is up to the survey creator to specify the context of the ranking.
For example, in Figure 12, the respondent’s most preferred pizza should be listed first.
The respondent will be able to move the list items using up or down arrows. The order in which you list the items for the question will be how the respondent sees them before organizing the answers themselves.
Likert
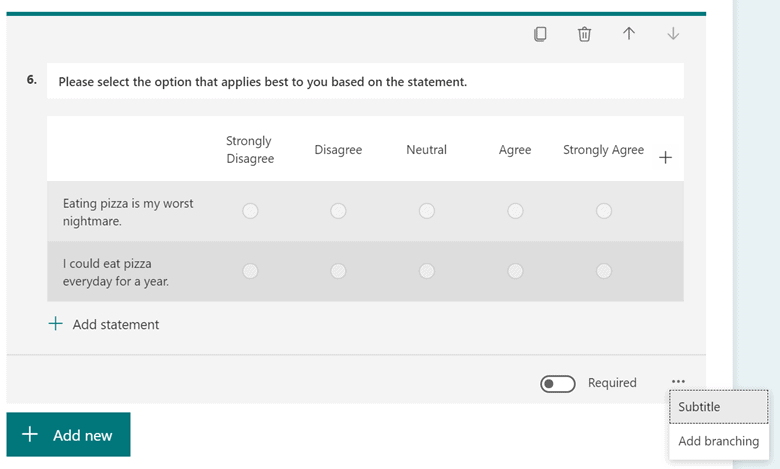
A Likert question asks the respondent to make a selection based on a statement. This is most often used to gauge attitudes and opinions about a topic.
File Upload
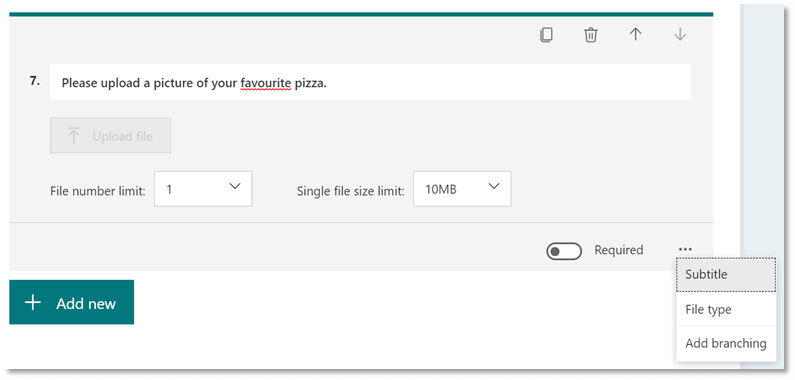
MS Forms allows for file uploads. With this type, the survey creator can specify what type of file they will be allowed to upload along with the total number limit and file size limit.
If you are looking to collect file uploads from individuals outside of your organization, you must make sure that your organization allows for external sharing.
Net Promoter Score
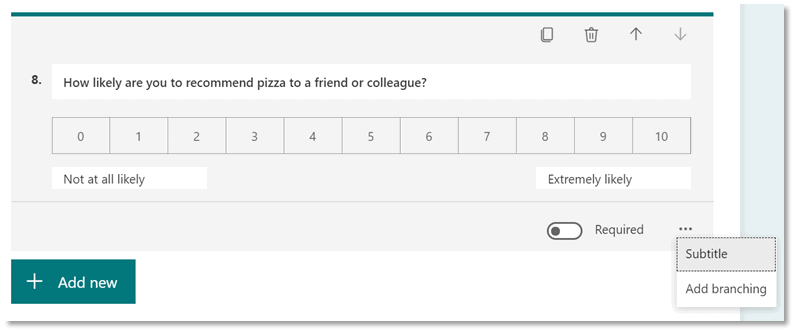
The last question type is Net Promoter Score (NPS). An NPS is a metric used to determine how likely the respondent is to recommend a particular item to a third party. The NPS is calculated based on the percentage of Promoters minus Detractors. Learn more about NPS in Microsoft Forms.
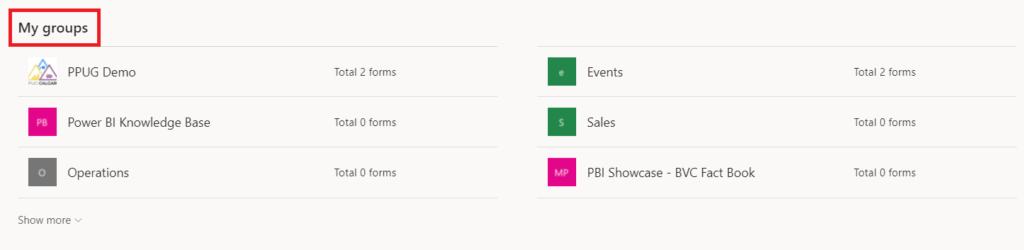
Where is my form located?
If you wish to find your form after creation, you can locate it by going to forms.office.com. It will be located under the My groups section and then within the group that you selected in SharePoint in Step 1.
Step 3 – Locate and copy the file path for the Forms response output file
Now that you have your survey, we can connect the forms response Excel file to Power BI using the Web connecter data source.
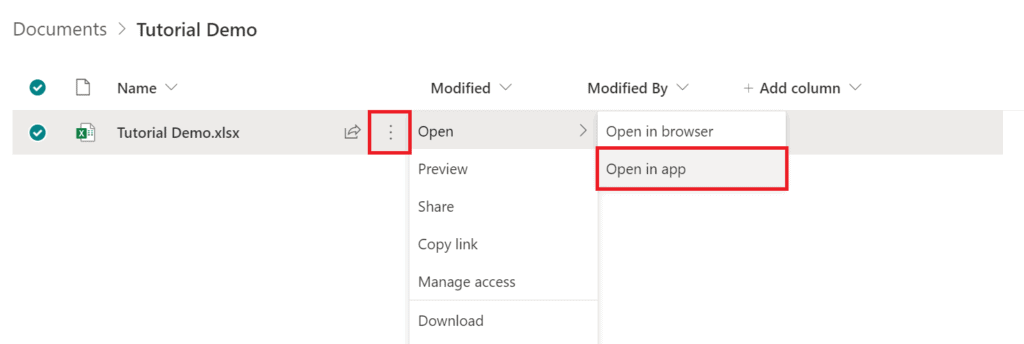
Locate the Excel file in SharePoint from Figure 6.

Open the file in the Excel Desktop App by selecting the ellipses then Open, and then Open in app.
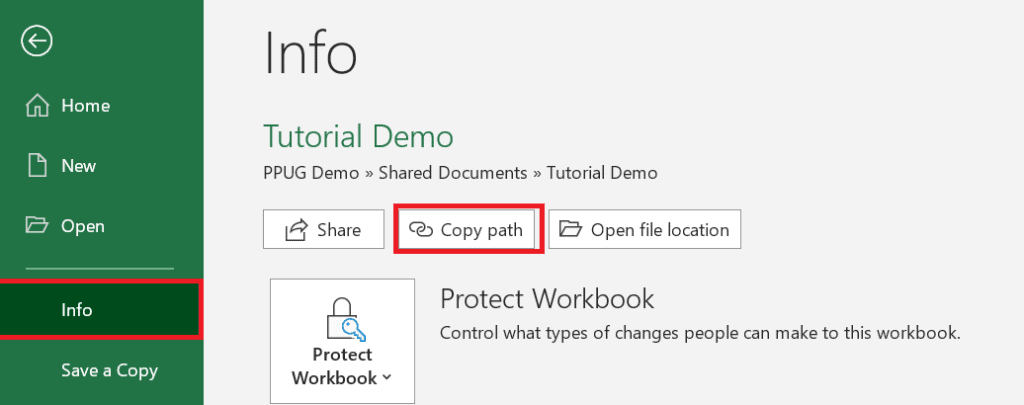
In the Excel file, in the top left corner go to File > Info > Copy Path.

Close the Excel file.
Step 4 – Connect the MS Form Responses File to Power BI through Web connecter
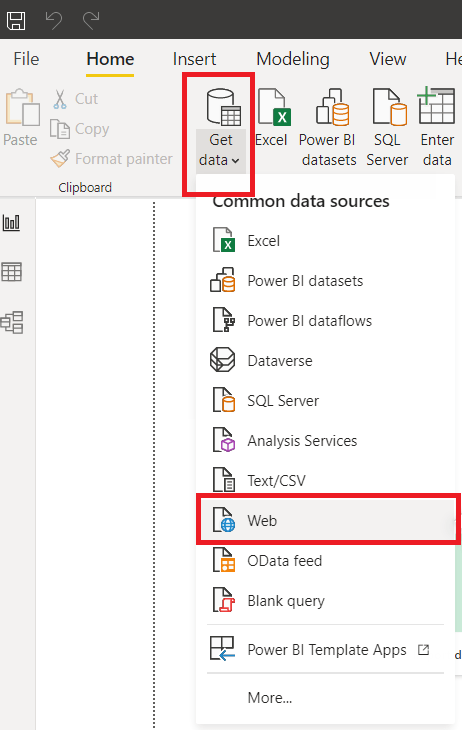
Open Power BI Desktop. In the ribbon, select Get Data > Web.
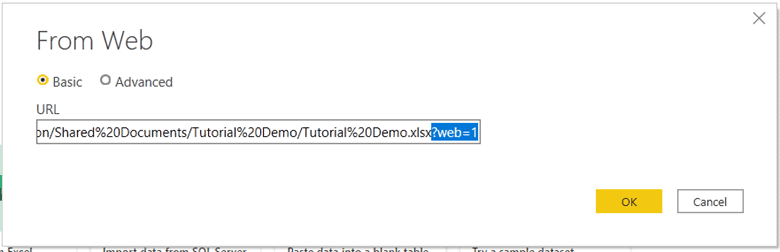
In the From Web window, paste the file path into the URL field and remove everything that comes after .xlsx and select OK.
From here Power BI will ask you to sign in using your SharePoint credentials.
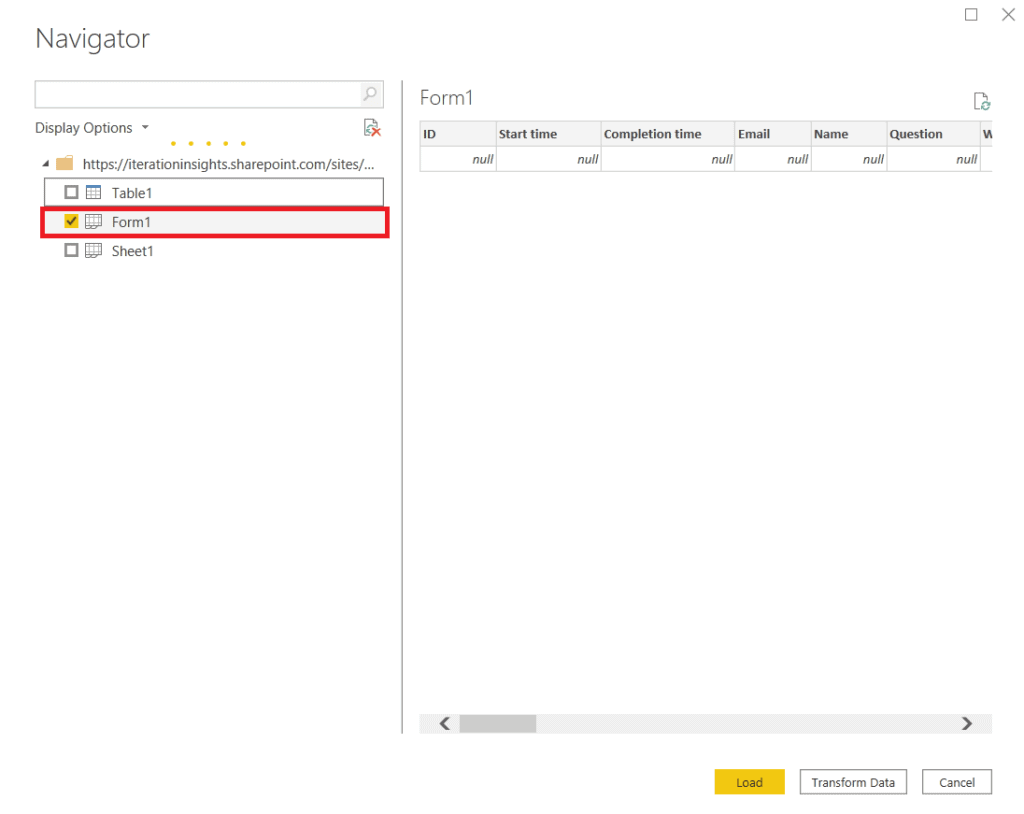
Once connected, the Navigator window will appear. Select Form1 and click Transform Data to open Power Query and start working on the data.
Congratulations, you have now connected your survey to Power BI!
For more information on how to model survey data check out this DAX Patterns blog by SQLBI.
Conclusion
I hope that this tutorial on how to connect a Group Form from MS Forms to Power BI was helpful for you. Please keep in mind that this method creates the survey and stores the responses in a Group in SharePoint. This means that anyone with access to the group can view and modify the form and responses. Feel free to fill out the survey that we created in this tutorial here.