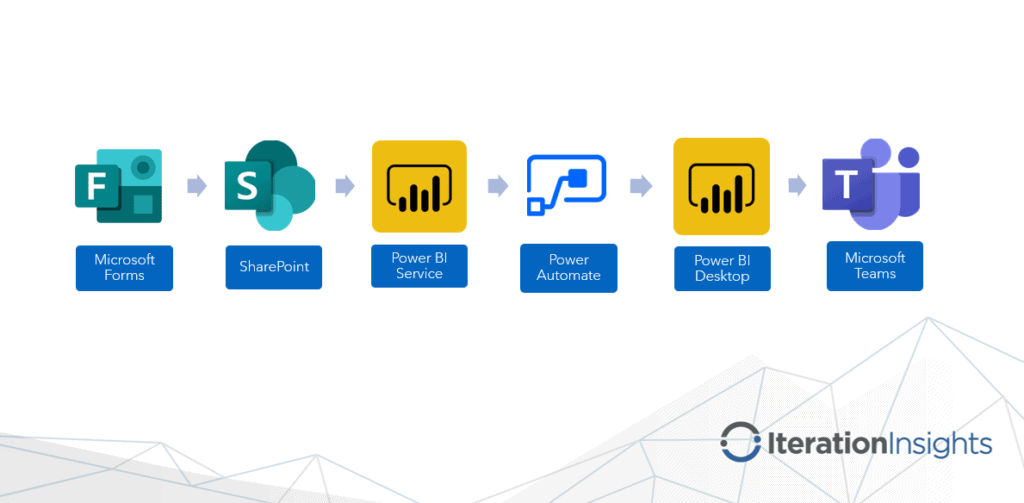
Check out the updated version of this process.
The method linked in the blog above uses the method of creating a Group Form in MS Forms by using the Forms for Excel option in SharePoint. This means that anyone with access to the SharePoint Group that the Form is created in will have access to the responses in the Excel file.
If you wish to connect to a privately owned survey in MS Forms to Power BI, continue on with the process below.
Table of Contents
- Step 1 – Create Microsoft Forms Survey
- Step 2 – Create a SharePoint List to store the survey data
- Step 3 – Create a Streaming Dataset in Power BI Service
- Step 4 – Create a Flow to automate the data import process
- Step 5 – Create Report in Power BI Desktop
- Step 6 – Share and collaborate in Teams
Iteration Insights has been running the Calgary Power Platform User Group (formerly Calgary Power BI User Group) since the end of 2018. However, as of April 2020, the meetings moved to virtual delivery because of COVID-19.
Similar to many other user groups, this transition presented a challenge of how to interact with members and keep them engaged. We decided to include polls to keep engagement up along with an opportunity to help us better understand our audience, and their areas of interest.
Surveying the group provides us with direct feedback to help our team manage the user group and make better decisions regarding topics in the future.
Our tool of choice is Microsoft (MS) Forms to collect the Survey data, and then use Power BI to visualize the survey results allowing for real-time updates as responses come in. While there are many direct connectors in Power BI, MS Forms does not have one.
To solve this problem, we utilized Power Automate to automate the process of importing the data to Power BI. This would use a steaming data set to import the data to Power BI and we will also use a SharePoint list to keep a master record store of the data collected from Forms.
Then we created the report in Power BI Desktop by connecting to the streaming dataset. Lastly, upon completion of the report, we connect it to the appropriate channel within MS Teams.
Here is the tutorial on how to go about this.
Need help with Power BI?
Let us talk about how Iteration Insights can improve your Power BI experience. From training to solution delivery, we got you covered.
Step 1 – Create Microsoft Forms Survey
To create a survey in MS Forms go to forms.microsoft.com and choose New Form.
At the top of the page give the survey a Title, we will use Survey Demo. Below this, click + Add new to add the first question. Choose Choice as the question type for the three Demo questions.
Enter the following questions and choices or feel free to make up your own.
- Question 1: Is this your first time attending a Calgary Power Platform User Group Meeting?
- Choice: Yes/ No
- Question 2: How did you find out about this event?
- Choice: Calgary Power Platform User Group Site/ Twitter/ LinkedIn/ Word of Mouth/ Other
- Question 3: How long have you been working with Power BI?
- Choice: 1 – 6 month/ 6 – 12 months/ Over 1 year/ I do not use Power BI
Click + Add Option to add more choices to the question.
Click + Add New to add New Question.
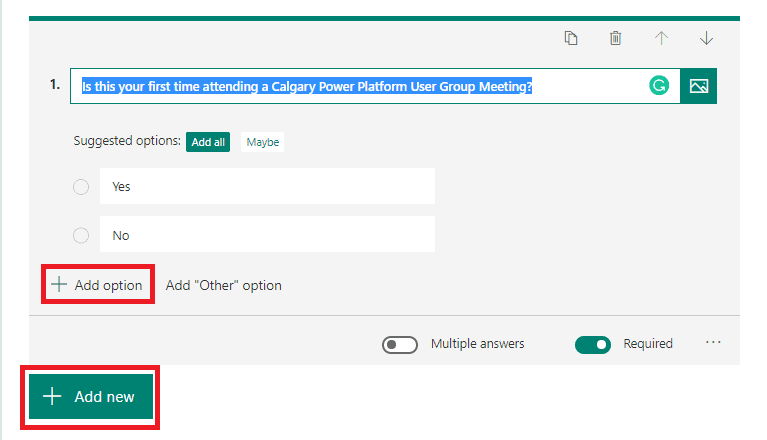
This is what your survey should look like.
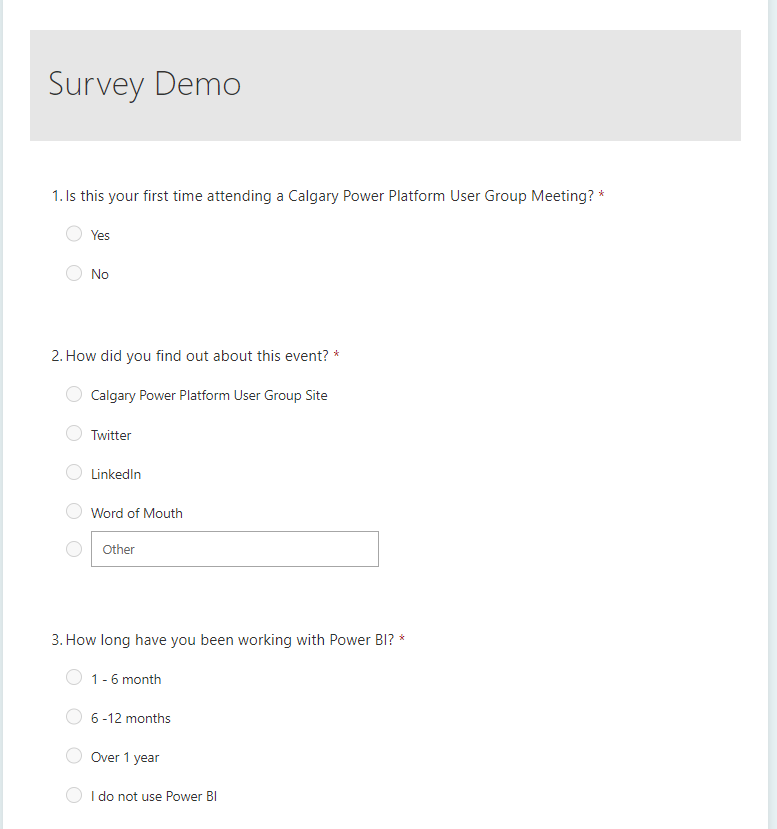
Once you have created the questions in forms. Now we need to create a SharePoint List to store the survey data.
Step 2 – Create a SharePoint List to store the survey data
Go to the SharePoint site where you would like the list to live, we are using our PPUG Demo site and create a New List, enter a List Name, we are using Survey Demo.
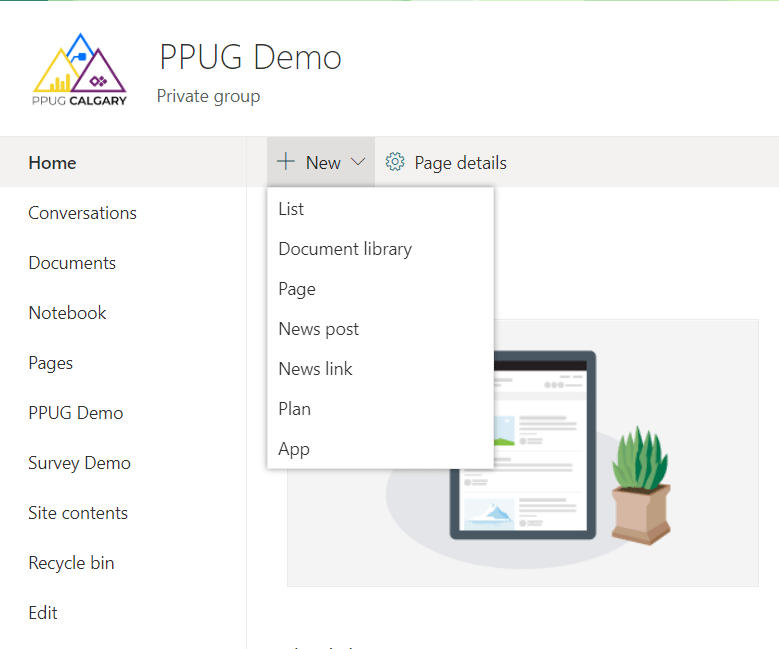
Once the New List has been created, it is time to add new columns to the list. You must create one column for each of your questions, in this case, we will be making three columns.
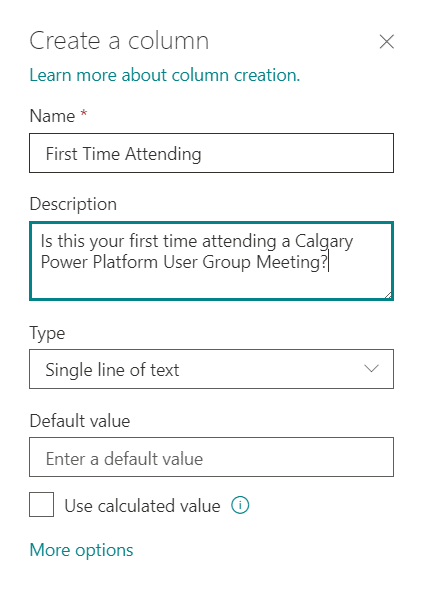
Click on + Add column, you should see a dialog box pop up on the right side.
Fill in the form as such:
Name: Description of the Question
Type: Single line of text
- Note, because the data from Forms displays in text format you can create all your columns with a single line of text type, regardless of whether it is a number or date.
Description: Question from the survey
Do this with the three questions and name the columns: First Time Attending, Event Source, and Power BI Experience (to store Survey results).
This is what your list should look like.

Now that the SharePoint List is ready, let’s create a Streaming Dataset in Power BI Service.
Step 3 – Create a Streaming Dataset in Power BI Service
Go to powerbi.com. Locate the workspace where you would like your dataset to live. I am using My workspace to create a streaming dataset.
In My workspace, click + New and then choose Streaming dataset.
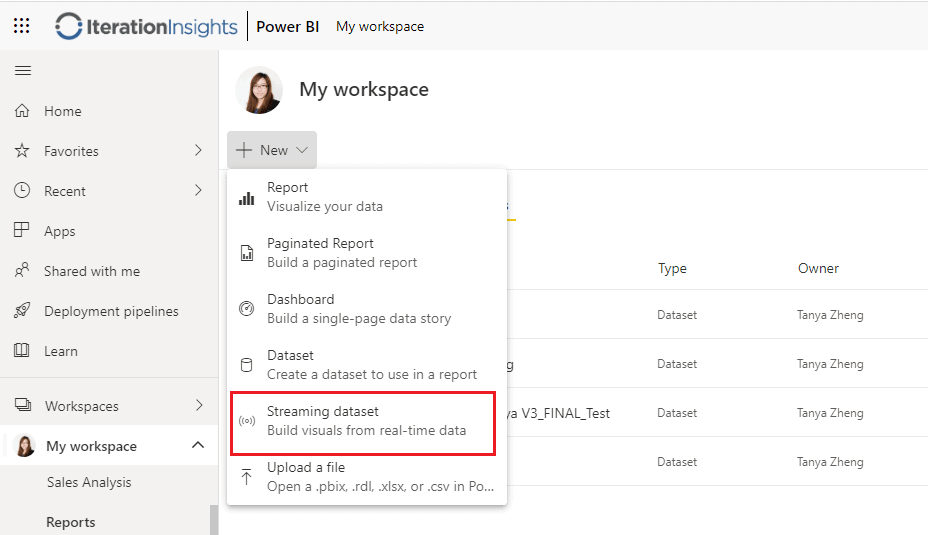
Choose API as the source of your data, and click Next.

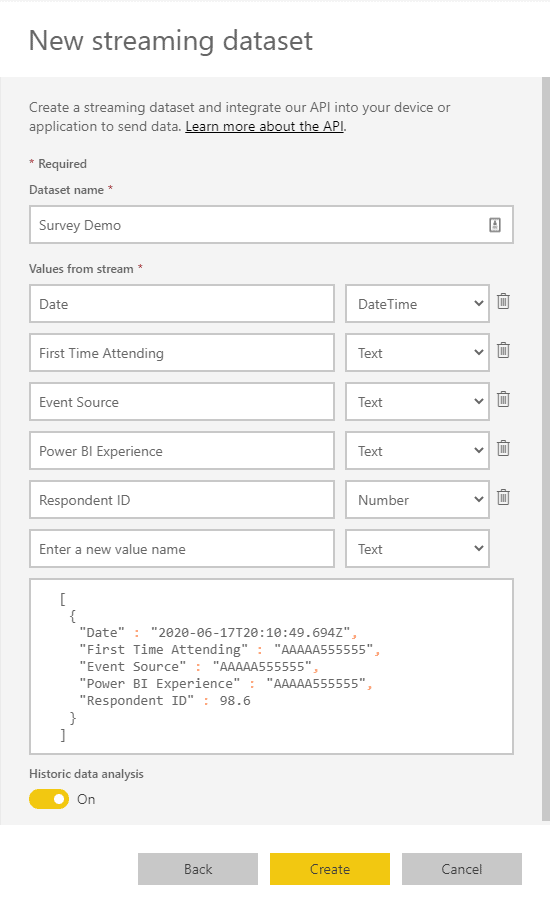
In the New streaming dataset dialog box, enter Survey Demo as the Dataset name, enter Values from stream as shown in Figure below. Turn on Historic data analysis, then click Create.
The new dataset, Survey Demo is now added to My workspace.
Struggling with your analytics journey?
Let Iteration Insights get you on the right path, view our services to see how we can help you today.
Step 4 – Create a Flow to automate the data import process
Now that the SharePoint List and the streaming dataset are ready, let us create a flow to automate the process of populating them with data.
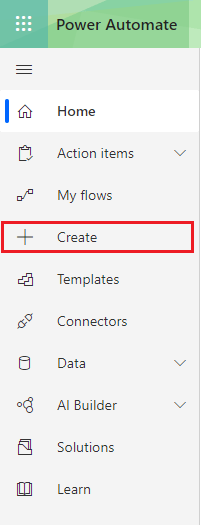
Go to flow.microsoft.com, click + Create on the left-hand navigation pane.
Choose Automated flow.
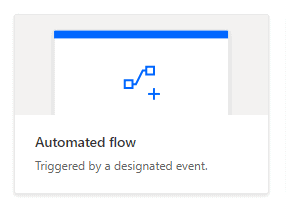
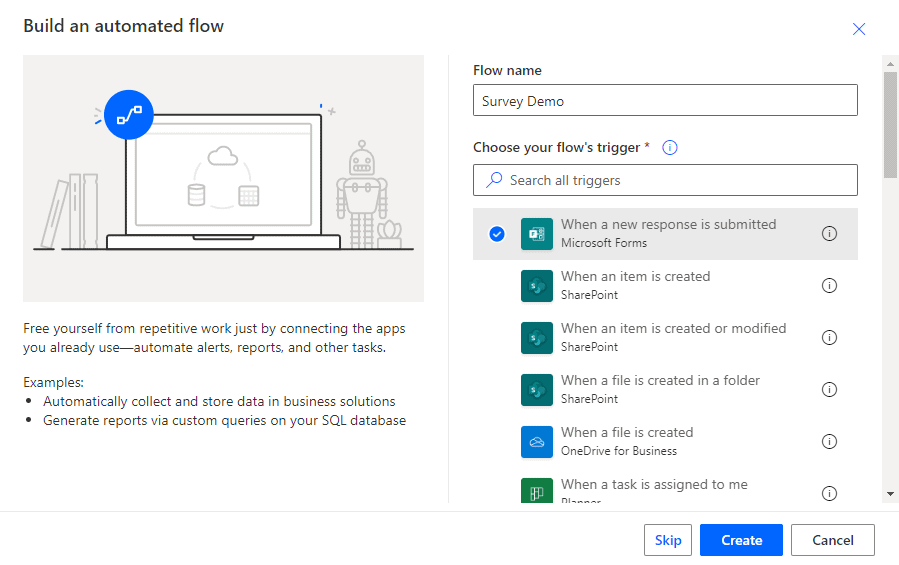
In the Build an automated flow window, enter Survey Demo as the Flow name.
Choose When a new response is submitted as the flow’s trigger. If you cannot see the option, type the trigger name in the search bar.
Click Create.
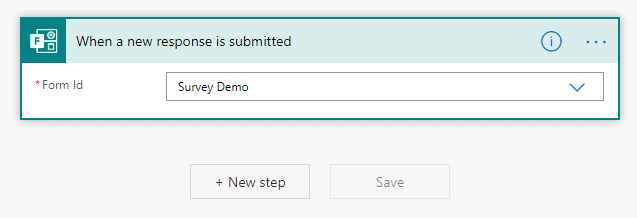
This will populate the flow with the trigger ready. With-in the trigger, in the Form Id drop-down list, choose the survey you created in Step 1. Ours is called Survey Demo.
Then click + New step.
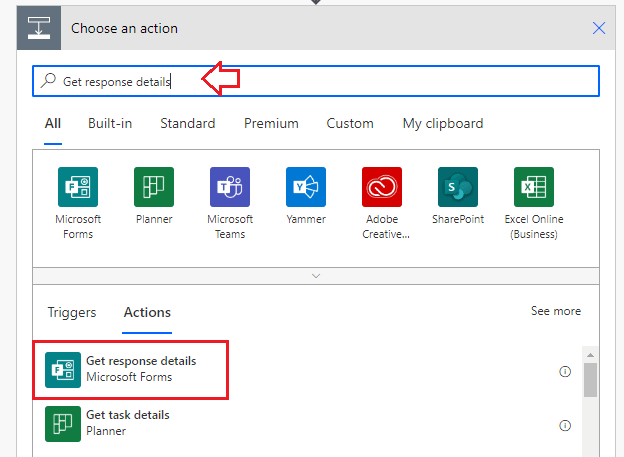
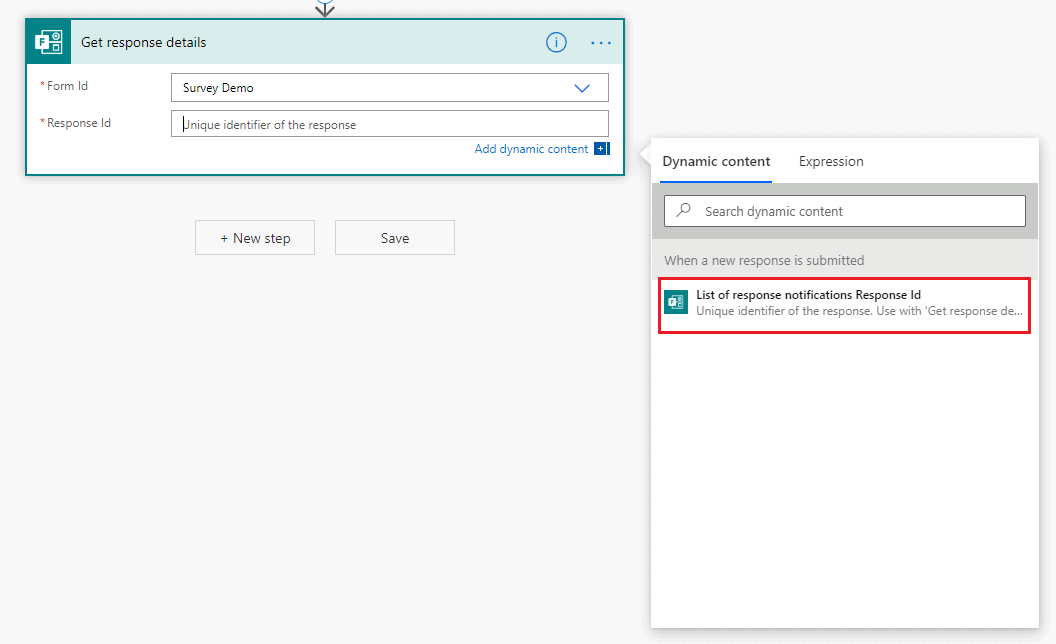
From the Choose an action Search bar, enter Get response details. This will allow you to populate the flow with Dynamic Content from the survey.
Under the Get response details step, choose Survey Demo as the Form Id.
For the Response Id, select List of response notifications Response Id from the Dynamic Content button in the bottom right corner.
Then click + New step.
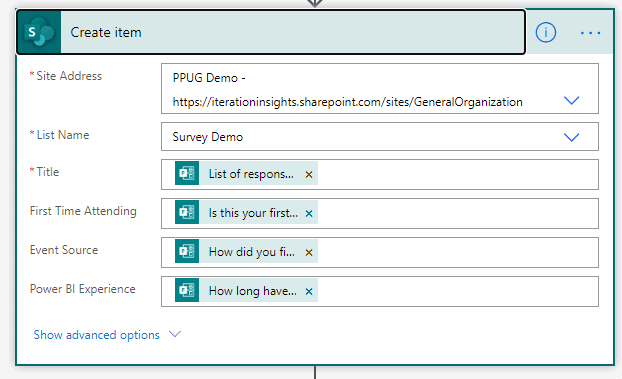
In the new step, type Create Item in the search bar, select the one from SharePoint. Configure as the following using Dynamic Content. Using Dynamic Content will allow the list to populate with the responses from the Form. Once completed, click + New Step.
- Site Address: PPUG Demo
- List Name: Survey Demo
- Title: List of response notifications Response Id
- First Time Attending: Is this your first time attending a Calgary Power Platform User Group Meeting?
- Event Source: How did you find out about this event?
- Power BI Experience: How long have you been working with Power BI?
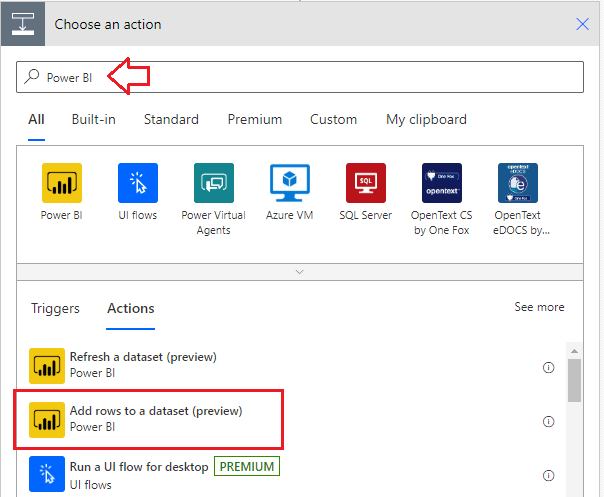
Once finished, click + New Step and type Power BI in the search bar and choose Add rows to a dataset.
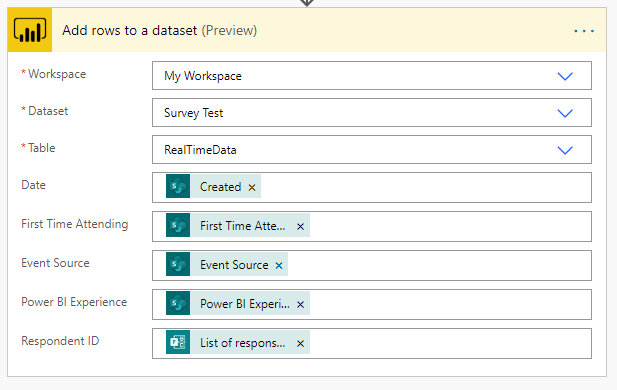
Configure as the following,
- Workspace: My Workspace
- Dataset: Survey Demo
- Table: RealTimeData
- Date: Created
- First Time Attending: First Time Attending
- Event Source: Event Source
- Power BI Experience: Power BI Experience
- Respondent ID: List of response notifications Response Id
Once completed, click Save.
The Survey Demo Flow should look like the following.
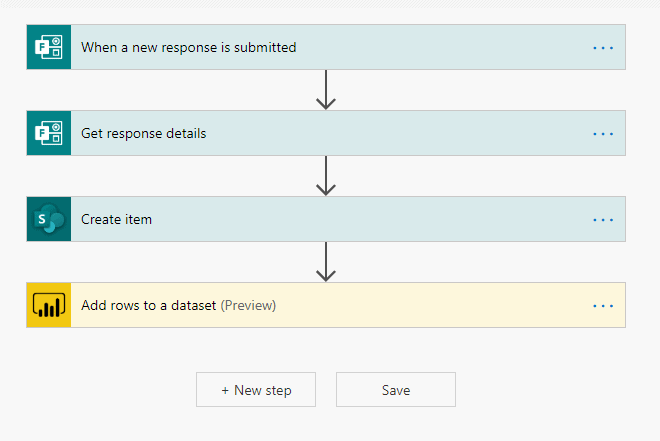
Now that we have the steps in place, let us test this flow to ensure it is working properly. In the top right corner, click on Test and choose I will perform the trigger action. Then Test.
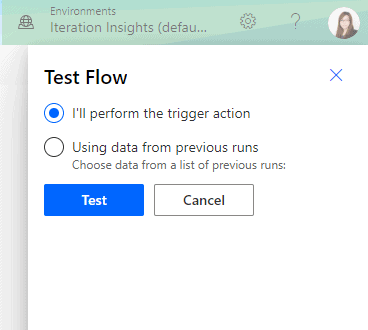
Then go to the survey you created in Step 1 and submit a response. Switch back to the Flow page, a notification shows Your flow ran successfully.

Step 5 -Create Report in Power BI Desktop
Now that you have the MS Form survey connected to Power BI, you can build your report from Power BI Service or Desktop. I prefer to build the report in Power BI Desktop, so I will walk you through that process.
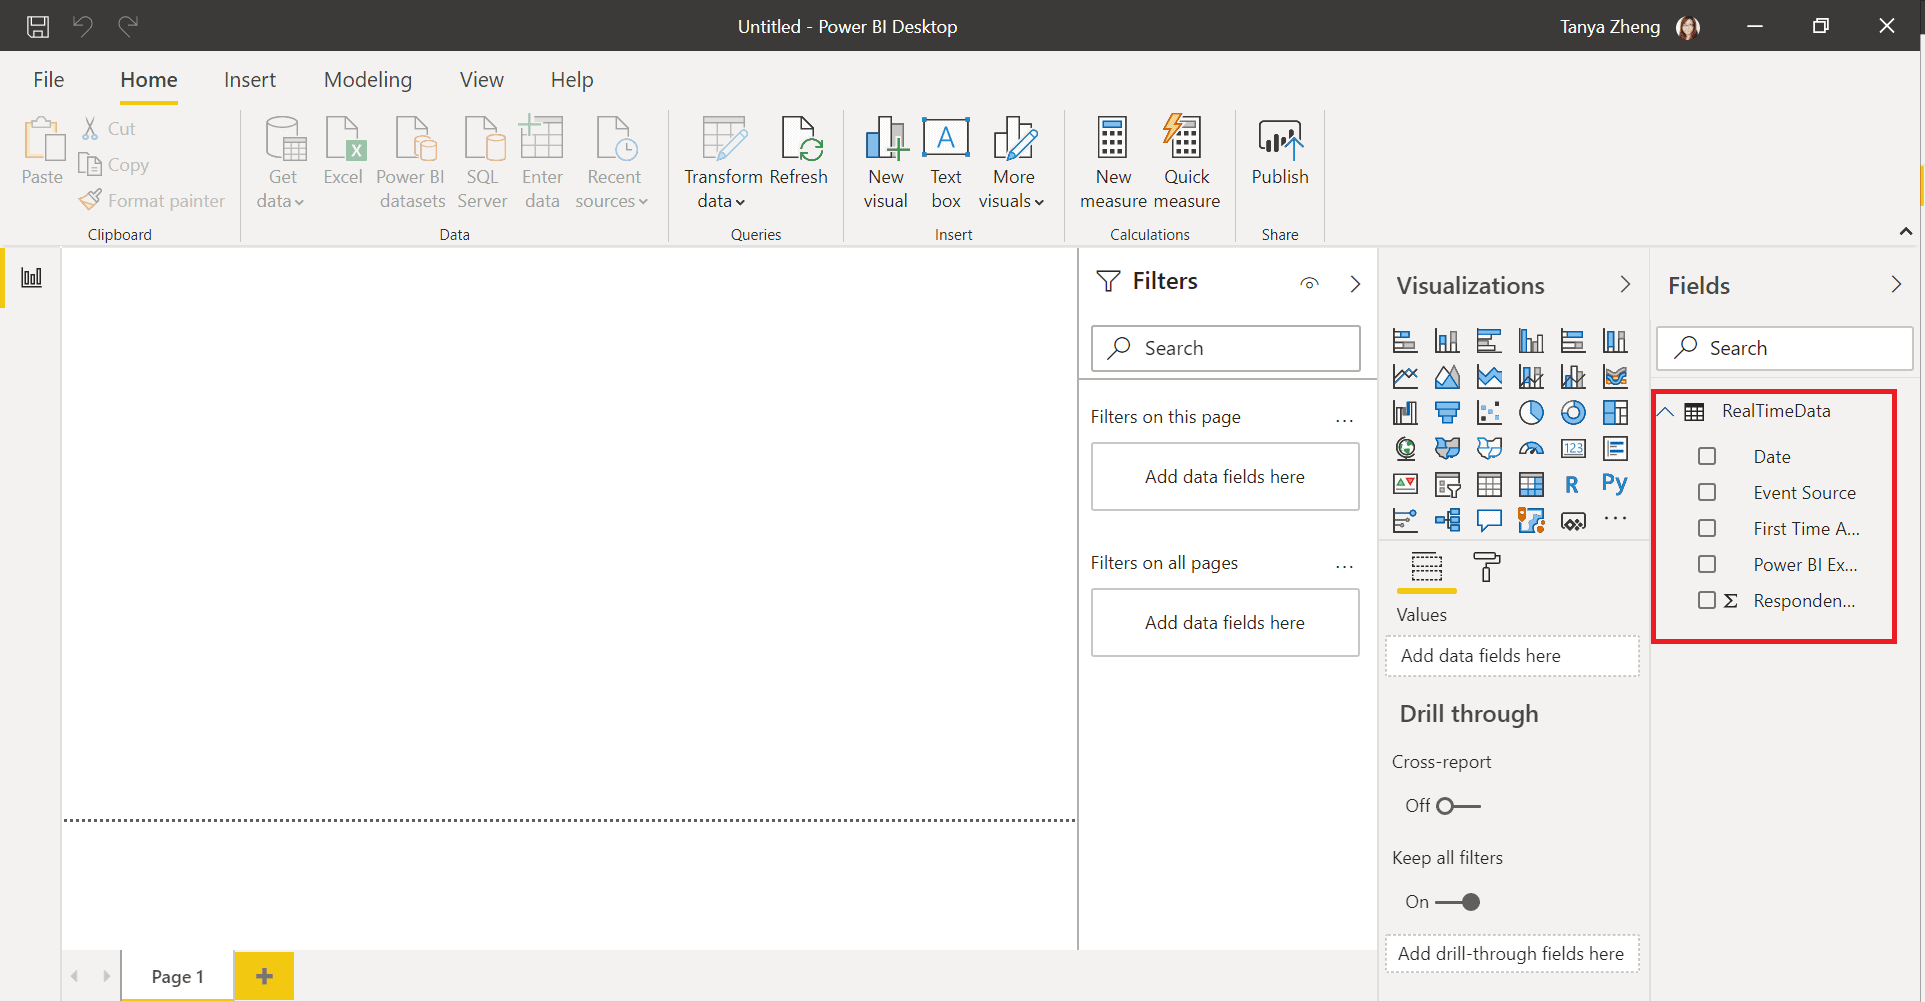
Open Power BI Desktop > navigate to Home > Get data > Power BI datasets.
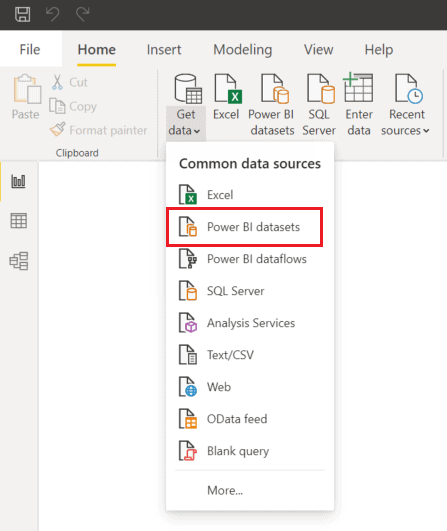
Choose Survey Demo from the list, then click Create.
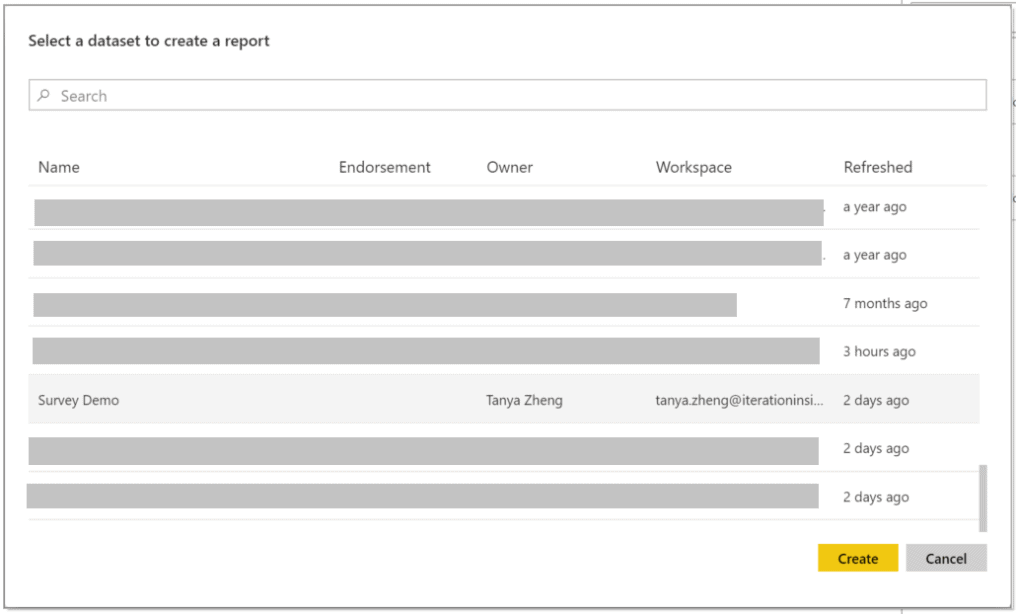
When the connection is built, you should see a table name RealTimeData with 5 columns: Date, Event Source, First Time Attending, Power BI Experience, and Respondent ID.
From here you can build and configure your report as needed.
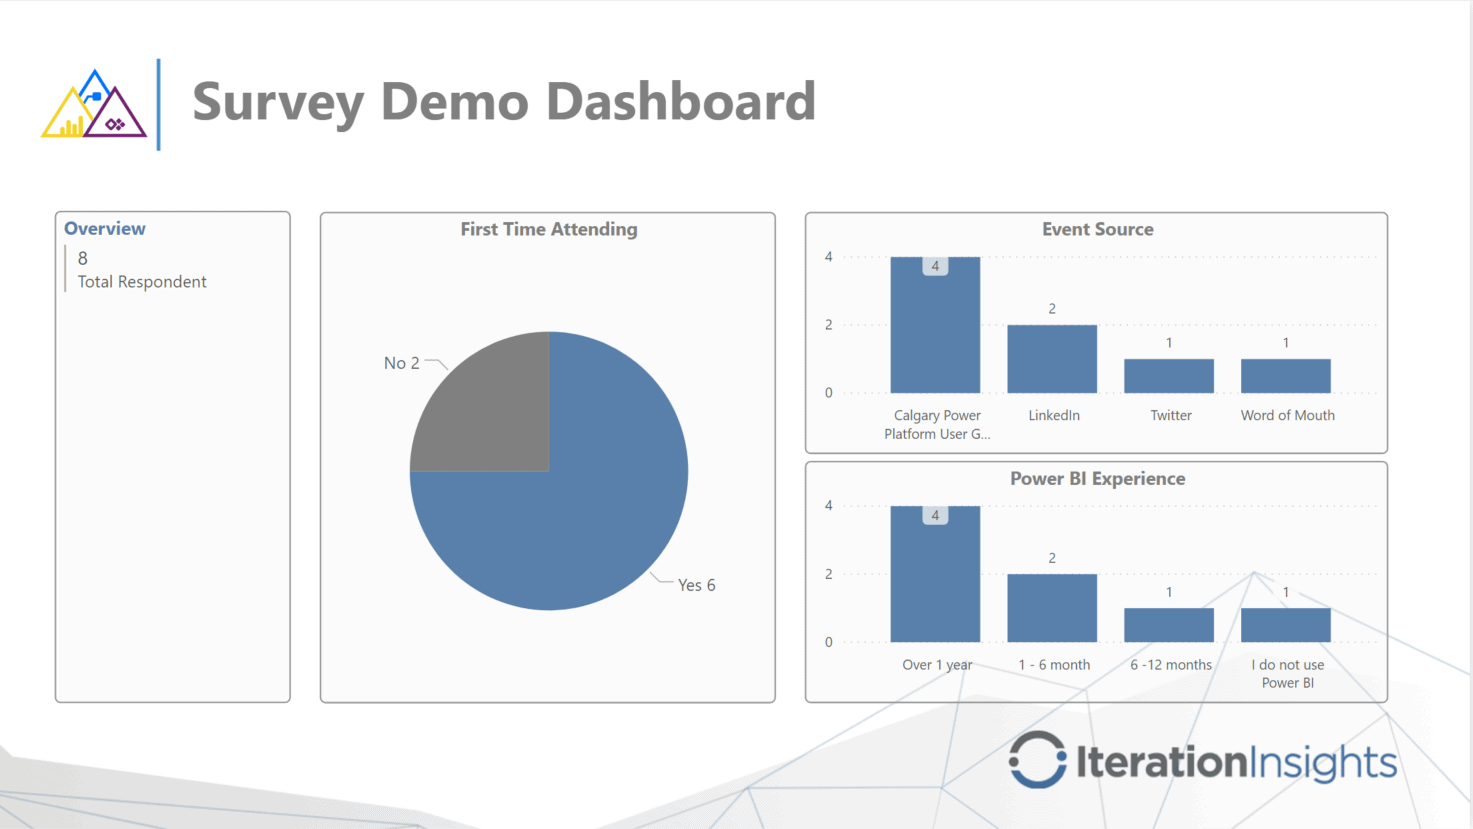
Here is what our Survey Demo Dashboard looks like. Save the Report, then Publish it to the service – My Workspace.
Step 6 – Share and collaborate in Teams
Lastly, it is our preference to access our Power BI reports through MS Teams. As such, we need to share this report with the appropriate channel in Teams.
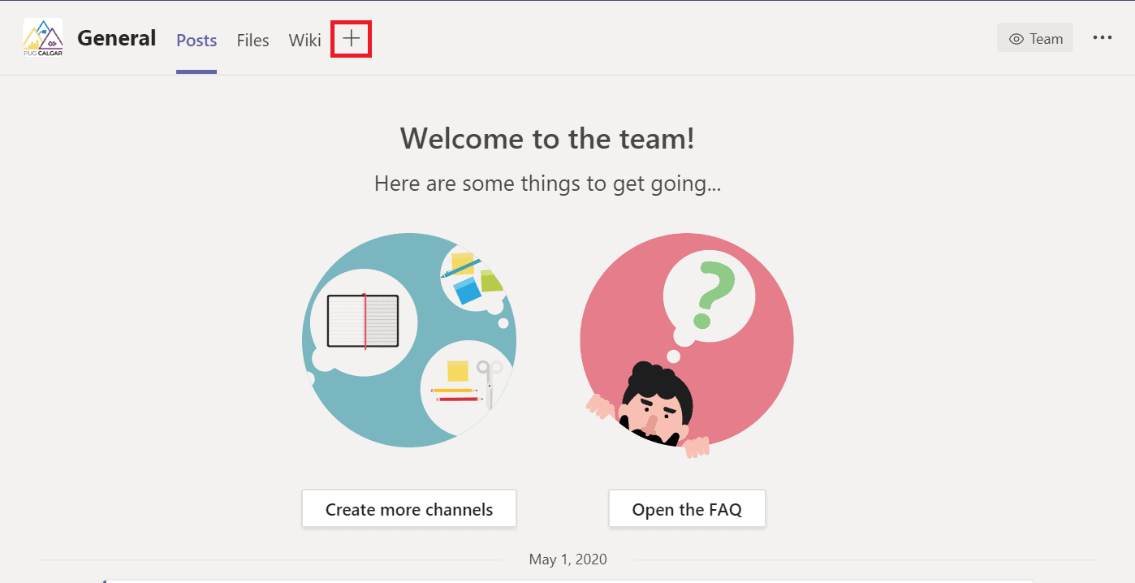
Locate the channel you wish to access the report ours is in PPUG Demo > General channel. In the top menu, click the + icon to add a new tab to the channel. In the Add a tab window, choose Power BI.
In the Power BI window, select My workspace, and then Survey Demo Dashboard.
Click Save.
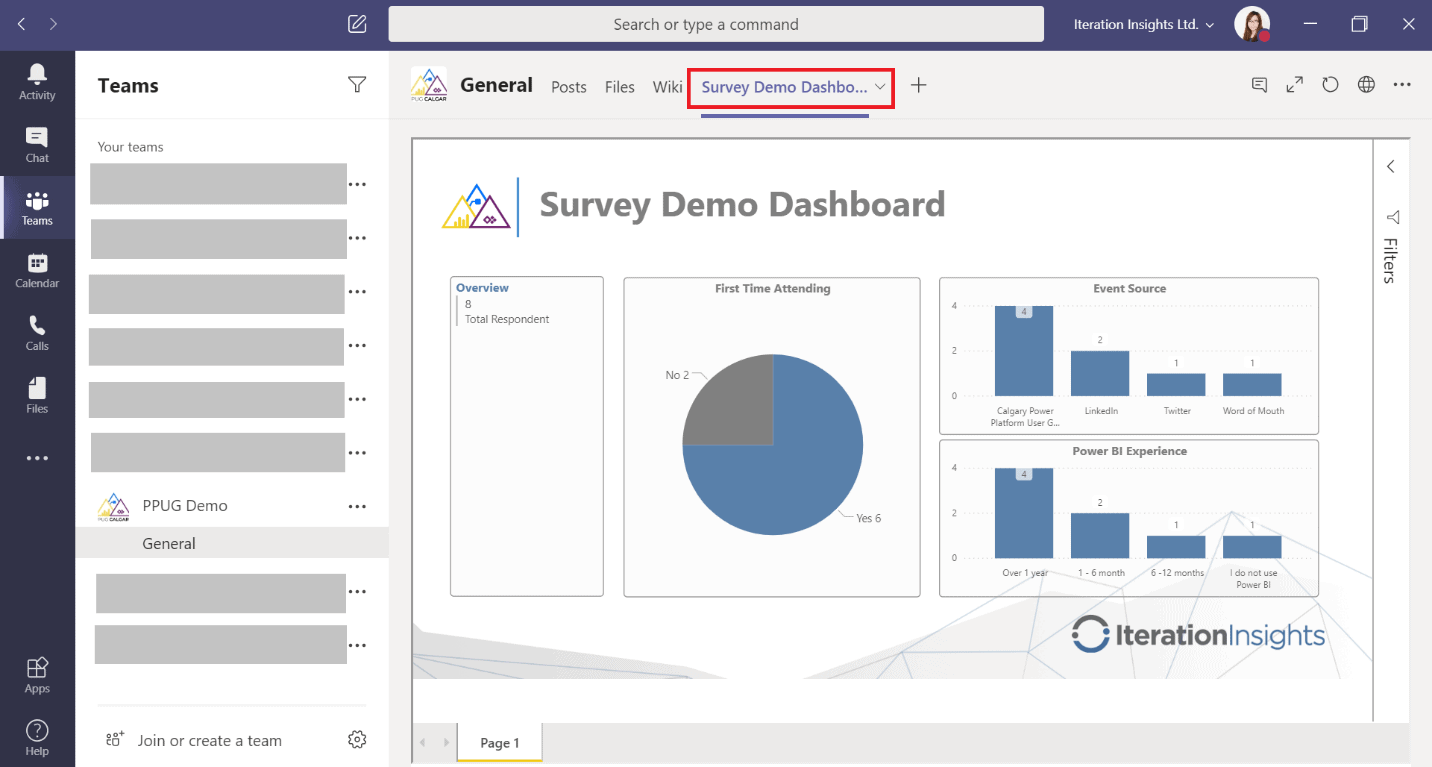
The dashboard will now be displayed in the menu at the top of the channel like so. We hope this helped you and your team out in our #newnormal. Stay tuned for more tips and tricks!
Stay Up to Date with Our Latest Blogs
Subscribe to our mailing list to be notified when a new article is released.


