
Sections
- Introduction
- High-Level Overview
- GitHub Code
- Environment Setup
- CETAS on a Single File
- CETAS on a Set of Files
- Conclusion
- Additional Resources
Introduction
External Tables are useful and powerful in different cases, especially in the Data Lakehouse architecture where you need to access data from Parquet Files or Delta (for example) and create tables to expose data to Power BI or Tableau.
The capabilities of CREATE TABLE AS SELECT(CETAS) are important to mention and can be used in a dedicated SQL pool or Serverless SQL pool. CETAS is a big player when we need speed and performance. They are fast to create and read depending on the type of table distribution we use when creating them.
However, depending on your data lake and Azure Synapse security setup, you will need to check certain folder and credential permissions requirements.
In Part 1 of this blog, we will go through the environment setup, roles, credentials, and creation of CETAS for one or multiple parquet files in the Dedicated Pool. Let’s remember that here you are creating a pointer to the files in the Azure data lake and what we see in the Serverless Pool (Table) is only the metadata that we can query. This means that we are not creating anything physically on the DB.
In part 2, we will use CETAS to dynamically create tables in the Dedicated pool to expose data in the Gold layer that has certain advantages when the business scenario uses this technology instead of a Serverless Pool.
Finally, another capability of CETAS is to create pre-calculate datasets as views for simple or complex queries and have them ready to be consumed by Power BI – we will cover this scenario in part 2.
High-Level Overview
These steps assume you have an existing Azure Synapse Workspace, a Serverless SQL pool, Azure Data Lake Gen 2 folder structure, and a parquet file to be read.
Please note: We will use The Microsoft Wide World Importers DW as a data source for these examples.
- Wide World Importers DW can be found here
- Check Roles to access the AZDL Gen2 storage
- Create SAS Token for the database credential
- Check if there is any credential created previously in the Dedicated Pool
- Create DB Master Key
- Create DB-scoped credential
- Create an external data source
- Create External File Format
- Verify the source and destination Mapping for CETAS
- Create an External table on a single file
- Create an External table on a set of files
GitHub Code
The code used can be found here as cetas_part1.sql
Environment Setup
Map of Azure Resources in the testing environment.
Storage Account: jgstoragedatalake
Container: deltadev01
Folder: bronze
Source Azure SQL Database: World Wide Importers DW
Azure Dedicated Pool: wwi_dedicatedsql
Azure Synapse Workspace: synapsedev-iterations
Step 1: Check Roles to Access the AZDL Gen2 Storage Account
External Tables can access two types of storage Public and Protected. Here, we are setting up the protected storage using a Shared Access Signature Credential with Azure AD identity.
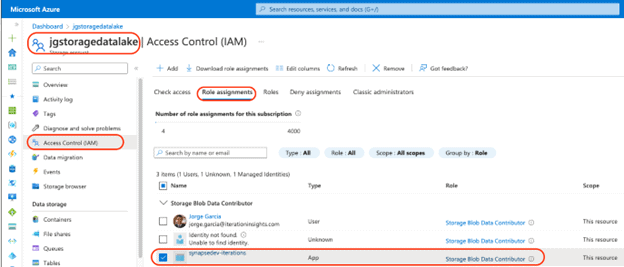
Go to the storage account and Select Access Control (IAM)
- Assign Storage Blob Data Contributor Azure role to the Azure Synapse Analytics servers managed identity on the ADLS Gen 2 storage account.
We can assign this by using the Azure portal, and navigating to the IAM(Identity Access Management) menu of the storage account. We can also do this using Power shell. Please note that the role is assigned to the synapsedev-iterations App type (Azure Synapse).
- Optional: If you are using a pipeline and trigger to run CETAS as an automatic process and getting a “Forbidden access Error”. ACL might be needed at the folder level using Azure Storage Explorer. You can find more about ACLs in Azure Data Lake Storage Gen2 here.
Step 2: Create SAS Token for the Database Credential
By creating a Shared Access Signature, we are granting access to the resource for a specific period of time.
In this scenario, we will create the SAS token to be permanent so that we do not lose access after days, weeks, months, etc.
At a high level, this is how SAS tokens work:
- Your application submits the SAS token to Azure Storage as part of a REST API request.
- If the storage service verifies that the SAS is valid, the request is authorized.
- If the SAS token is deemed invalid, the request is declined and the error code 403 (Forbidden) is returned.
After a brief review of how the SAS token functions, let’s create it:
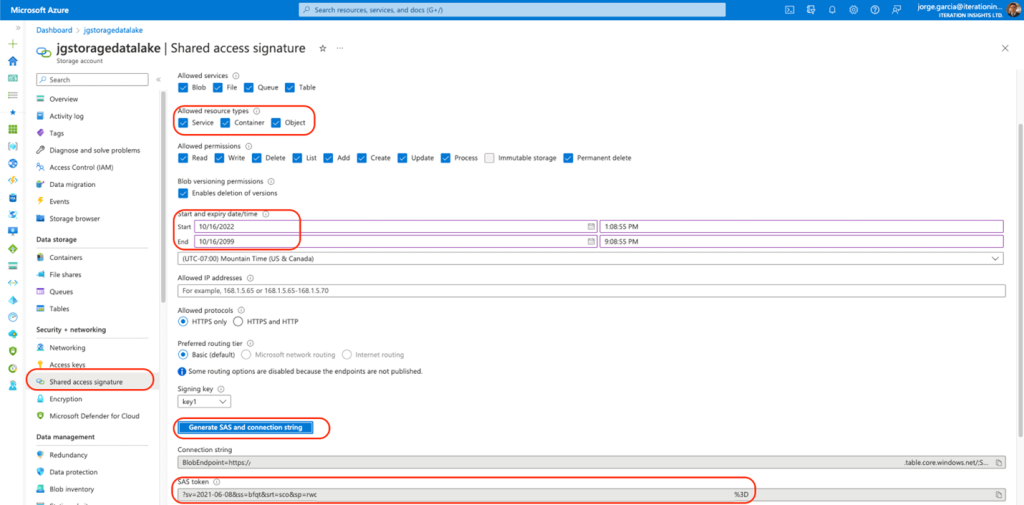
- Go to storage Account and select Shared Access Signature
- On the Allowed resource types, select (Service, Container, and Object)
- For the Start and expiry date/time, set up as follows:
Please note: Start is your current date and End is to be set up to the year 2099. This also can be set up to the first day and first month of the year 01/01/2099
- Start 10/16/2022
- End. 10/16/2099
- Click on Generate SAS and connection string, this is needed for the creation of the credential at the Database Level.
- Save the SAS token as it is going to be used later.
Step 3: Check if There Is Any Credential Created Previously in the Dedicated Pool
Using SSMS please use the SQL scripts to verify Credentials in the Database.

If there is a master key created, was likely created in the creation of the database by the developer or DBA.
Step 4: Create DB Master Key
Please note that the Master key must meet policy requirements.

- Verify the presence of the key

Step 5: Create DB-Scoped Credential
- Here we are going to use the SAS token we generated in Step 2
- Please note that to use the SAS token we need to remove the symbol “?” at the beginning of the string for the SECRET
- Example: ?sv=2021-06-08&ss=

- Verify the creation of the credential

Step 6: Create an External Data Source
- The external data source is going to reference deltadev01 storage account that is protected with a SAS key.
- Save the ABFSS path needed for the credential. This is the folder where the parquet files are going to be accessed. Please note that this can be found on the properties of the Azure Data Lake Gen 2 storage under the Data blade in Azure Synapse.


- LOCATION = ABFSS Path
- CREDENTIAL = Previous Scooped Credential Step 5
- Please note that ABFSS Path must use the string until .net, do not put the name of the folder

- Refresh the connection of the Dedicated Pool in SSMS, now we have the External Data Source created

Step 7: Create External File Format
- Create external file format, in this scenario we are using PARQUET
The following table list the data formats supported:
| Data format (Native external tables) | Serverless SQL pool | Dedicated SQL pool |
| Parquet | Yes (GA) | Yes (public preview) |
| CSV | Yes | No(Alternatively, use Hadoop external Tables) |
| Delta | Yes | No |
| Spark | Yes | No |
| Dataverse | Yes | No |
| Azure Cosmos DB data formats (JSON, BSON etc.) | No(Alternatively, create view) | No |
- Please note that this table can be updated since the creation of this blog, review Microsoft Documents
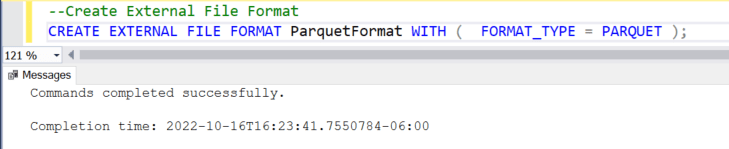
- Refresh the connection of the Dedicated Pool, now we have the External File Format created

Step 8: Verify the Source and Destination Mapping for CETAS
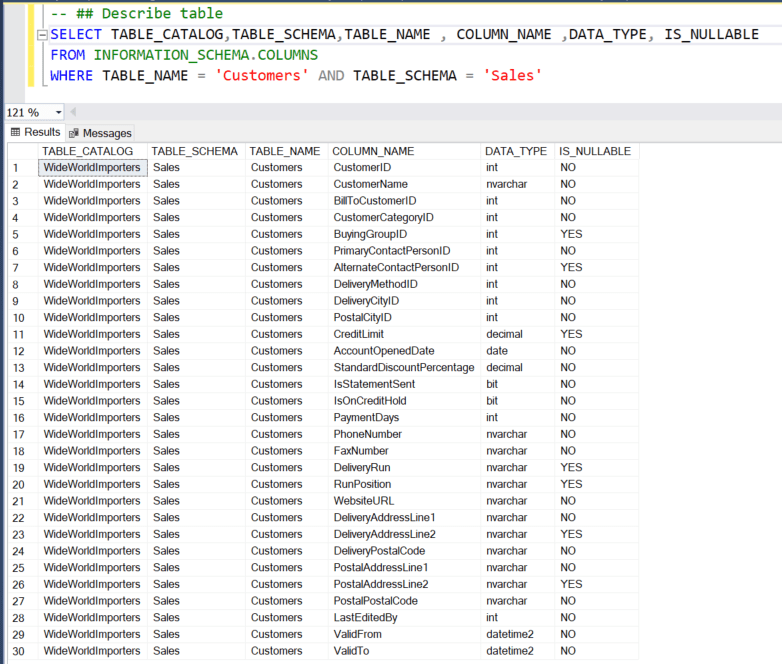
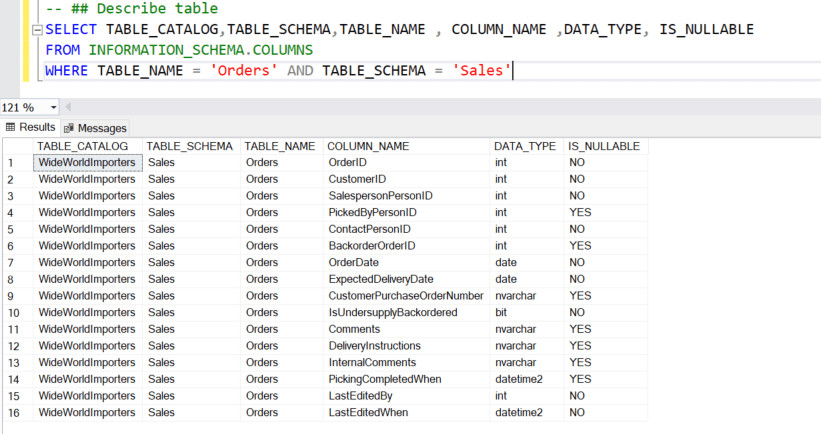
- We are using the Customers and Orders from Sales schema for the creation of the Tables. First, we need to describe the structure of the source table to create the SQL script with the appropriate columns and datatypes for the Table destination.
- Describe Sales. Customers
- Describe Sales. Orders
Create an External Table on a Single File
- We are going to use Sales. Customers.parquet for the creation of the External Table
- Please note that for the source table if you are not the creator and the values for the data types are unknown, we are going to assume the range depending on the context of the column and use max values for strings like nvarchar. Datatypes can vary from DB to DB and this will need further analysis of the table columns.
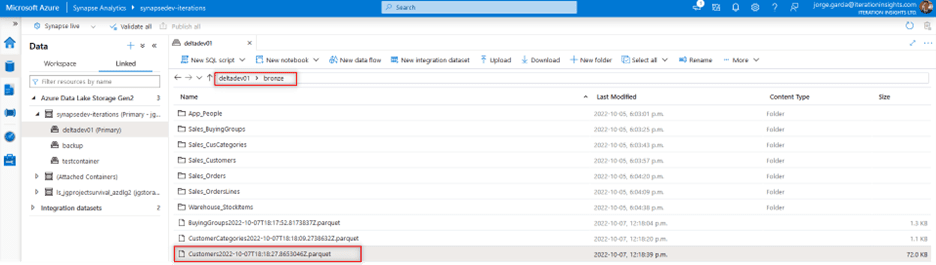
- The LOCATION can be found at the properties level of the folder that contains the parquet file as Name property.


- LOCATION = Name Property of parquet file
- DATA_SOURCE = DeltaLakeStorageDS
- FILE_FORMAT = ParquetFormat
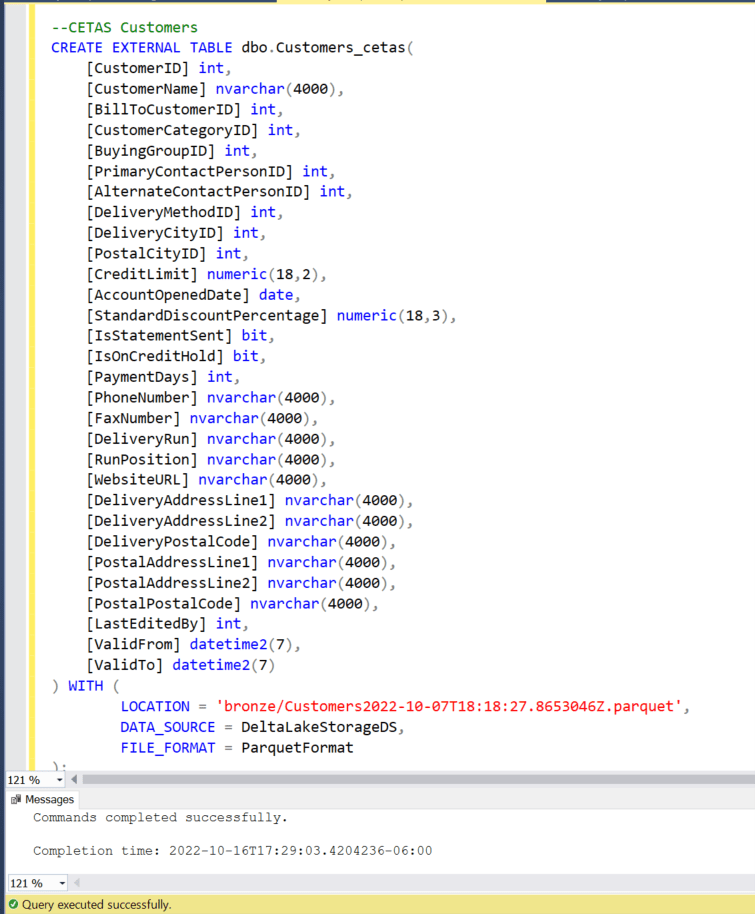
- Refresh the connection of the Dedicated Pool, now we see the External Table “Customers_cetas” created
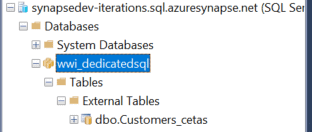
- Finally select the table “Customers_cetas”

Create an External Table on a Set of Files
- In this case, the method is the same and the only difference is using the asterisk symbol to read all files recursively in the folder. I will only show the final script.
- LOCATION is the only property that changes in the script with the use of (*)

- Complete script
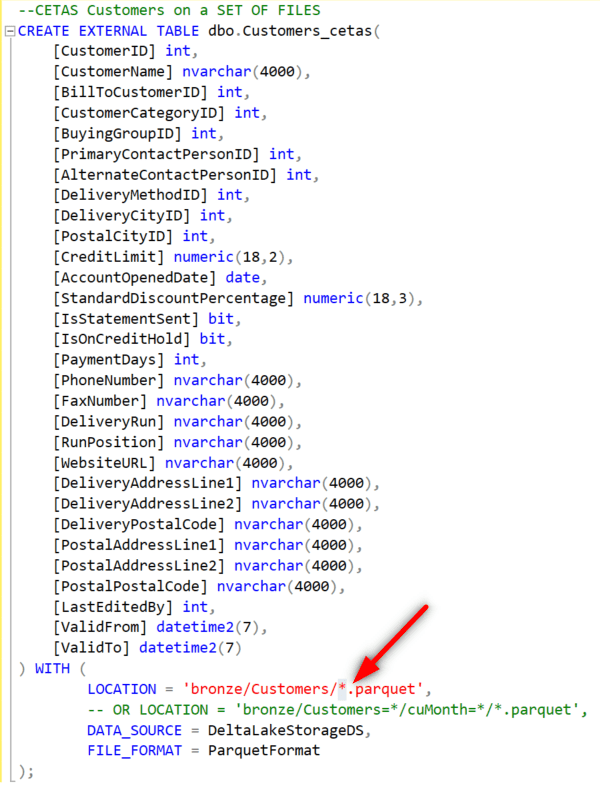
- Please note that in this example I am reading from a subfolder Called Customers where I have all the subset parquet files that are part of the whole dataset for the table.
- Also, note that if you have a dynamic folder pattern, this one can be satisfied with (*) and is required only for Parquet and CSV. Delta Lake format only needs a root folder. The external table will automatically find the pattern.
Conclusion
Create External Table As Select (CETAS) is a great resource when you need access to files in Azure Data Lake through the different layers of a Data lake House Architecture. It is essential in this type of architecture to manage data spread in the different folders and sometimes in different types of formats like parquet, CSV, or delta.
The level of security needed in these types of projects requires in many cases the use of user delegation to the storage resource that needs to be set up so that automatic processes like Azure Synapse or Data Factory run smoothly and with no errors.
Therefore, using SAS and Azure AD credentials is powerful and beneficial for the privacy of a company’s data. Furthermore, with the use of CETAS the Data analyst or Data engineer can control and explode the data in the data lake for transformations or present information in the Visualization layer to Power BI and Tableau.
All in all, if you find yourself looking for ways to improve the access to files in Azure Data Lake and you need to expose data for the final Analyst well this is the way.
Additional Resources
You can find out more about Create use native External Tables using SQL Pools in Azure Synapse Analytics here
You can find out more about CETAS with Synapse SQL here
You can find out more about CREATE Master Key here
You can find out more about Use Azure Storage Explorer to manage ACLs in Azure Data Lake Storage Gen2 here
